Welcome to the WordPress Sandbox v1.2
What to expect
Below is a list of Plugins included in this Sandbox build. Some Plugins are deactivated by default and will need to be enabled to be used. All Plugins included in this Sandbox are set to auto-update. If you feel there is a Plugin that should be a core resource for this Sandbox, please let us know.
ASE
A plugin to easily enhance various admin workflows and site aspects while replacing multiple plugins doing it, and saving you time and effort along the way.
Learn MoreBetter Search Replace
After cloning or moving sites from one location to another, this plugin lets you fix old URLs in content, excerpts, links, and custom fields.
Learn MoreDisabled by Default
Bricks
An innovative, community-driven, visual site builder for WordPress. Empowering you to design unique, performant, and scalable websites. Code-free.
Learn MoreBricksable
Custom elements and extensions for Bricks Builder that focus on beauty, subtle animations, and visitor engagement. The perfect tool to build stunning websites.
Learn MoreBricksForge
The Swiss Army knife for Bricks! It not only enhances the native capabilities of the builder but also introduces a ton of new features to take your website to the next level.
Learn MoreEvent Manager
Event registration and booking management for WordPress. Recurring events, locations, webinars, google maps, booking registration and more!
Learn MoreDisabled by Default
Pods
Pods is a framework for creating, managing, and deploying customized content types and fields
Learn MoreWooCommerce
Our WordPress-based ecommerce platform helps merchants and developers build successful businesses for the long term.
Learn MoreDisabled by Default
Wordfence
Free version. Block attacks with the basic tools you need to keep your site safe. This version has a 30-day delay on firewall rules and malware signatures.
Learn MoreDisabled by Default
Yay SMTP
This plugin helps you send emails from your WordPress website via your SendGrid SMTP.
Learn MoreYoast SEO
Improve your WordPress SEO: Write better content and have a fully optimized WordPress site using the Yoast SEO plugin.
Learn MoreDisabled by Default
Bricks Best Practices
Bricks gives you many options when it comes to structuring the build of your project. Below are the recommended Best Practices when it comes to building.
Theme Styles

Before beginning any page layout or template creation, it is a good idea to setup a Theme Style for your project. To find these settings, crack open the Bricks Builder Editor, click on the Manage Gear icon in the top left, and you'll find Theme Styles. This allows you to control globals for typography, colors, padding, margin, etc for any element in Bricks. The Sandbox comes pre-built with some basic settings, but the Theme Styles are the foundation to build smartly.
Page Settings
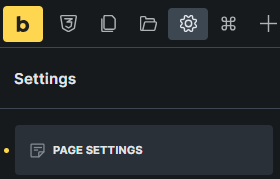
Just like Theme Styles, Page Settings is also a smart place to look prior to beginning layout. This will help setup how each page behaves within your project. These settings can also be found in the Bricks Builder Editor under the Manage Gear icon. Some of the key settings you'll find here are the ability to set a page background color for the this idividual page (if you need something different than was set on the full Theme), disabling pop-ups that might be set to display on the full site, classes that you need to attach to the tag, and full page margin (margin is not best practice, but if you need it, you can set it here).
Font Manager
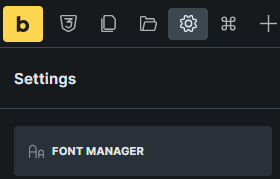
Also located within the Bricks Builder Editor is a new tool called the Font Manager. This is a simple but powerful tool to help optimize your use of fonts within the site. From the Font Manager, you can find the fonts you intend to use in your design, add them to your favorites, and they will automatically be listed at the top of all fonts when you go to select one. And on top of making it easy to find your font, it gives you the option to download & install the font as a custom font in Bricks. This helps reduce lag in font loading and gives the end user a better user experience.
Templates
Templates in Bricks are powerful, but are not needed for the entire build of the site. If you have setup your Theme & Page settings correctly, every page on the site can be built directly into the standard WordPress > Page > Edit in Bricks editor. This makes it simple to find where the content is located for end users, and makes it super simple to update. Havign to search through Templates to update content can be confusing and is not considered Best Practices. So when do you use a Template? Templates are great for Headers, Footers, Custom Content (Pods indiviual pages), Event individual pages, Product or Post pages, or a Section of a page that would be repeated across different pages (think sidebar, modals, off screen pop-outs). Any page/section that would have dynamic data is a good candidate for Templates. Unless a simple Query Loop is all that's necessary, then that also can be built directly into the Page.
Components

Components are another new tool in Bricks Builder's arsenal and they make creating identical content very simple. There's a lot to describe about them, so I won't go into too much detail here, but I will say if you have a repeatable complex element in your layout that does not contain dynamic data (ie not pulling content from Pods), then Components are the way to go. They allow you to build custom complex elements that give users the ability to update content without being able to completely change the layout of that element. As an example, each of these white boxes is a component. I highly recommend learning how to incorporate them into your layouts.
Custom Code
Between stock WordPress and Bricks, there are plenty of ways to inject some custom code into your projects. For consistency sake and to make it easy for everyone to find any of these customizations, we recommend adding any Custom CSS or JavaScript code in the following location in the WP Admin Dashboard: Bricks > Settings > Custom Code. There may still be a need to add custom CSS directly onto an individual Element, but for global CSS, the above location is preferred.
Preferred Elements
With Bricks, you have many elements to choose from, and in some cases there are multiple elements that can do the same job. Below are the Preferred Elements when building a site. There may be cases where these won't work, but for the majority of sites, these are your best options.
Pro Forms
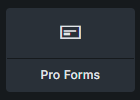
There is no longer a need for a 3rd-party plugin for creating forms. We have incorporated BricksForge into our Sandbox build which gives you the ability to create any form as elaborate as you can dream up. It has every field type you can think of (plus some you will never use), honeypots, reCaptcha built in, and all of the elements automatically use your Theme's look and feel without need any extra configuration. As a bonus feature, it adds a Submissions section into the WordPress Admin Dashboard where you can track all form submissions from every form on the site. This form has everything, is light-weight, and already integrated into Bricks. There's no reason not to use it.
Logo
It would be easy to overlook this Element and just use an Image Element when added a logo to the site. While the Image Element does work, the Logo Element is purpose built for this task. It gives you more control over how the Logo displays as well as already having all the built-in goodies needed for clean SEO.
Basic Text vs Rich Text

When looking at the two possible Text Elements in Bricks, it seems like the obvious choice would be to give the end user more control over the tex, and set them up with a Rich Text Block. I thought that at first too. However, while it is great to give the end users control over what content is being displayed, ideally we want to limit the end user's access to change the layout, look & feel of that content. The Basic Text Block allows the user to update their content's data without changing the look & feel. Rich Text Block gives them the ability to tweak look & feel (and ultimately break layout). This paragraph was added as a Basic Text Block and conforms to the design of the rest of the site. There are still use cases where a Rich Text may be required, but for most Text Blocks, stick to Basic.
This paragraph was added using a Rich Text Block
and gave me the ability to mess with the design without editing
anything
but the content in that Rich Text Editor.
Useful Built-In Classes
Need a design element to help bring your site to life? Here's a short list of classes that are built into this Sandbox that will make your site more engaging and interactive. If you want to have the same flair on your site, add any of these classes under Style > CSS.
stagger-text
Are you curious how we're able to get the subtle animation for all of our text blocks on this page? If you haven't noticed, scroll around a bit and
you'll see as you scroll to a text block, the content slides up, spreads out, and becomes opaque. Neat, huh?
list-underline-hover
Have a Nav Bar and need it to be more interactive? Really any List Item (li) can become more interactive with this class. Check the example below and hover over one of the Nav items. Nice, smooth transition and much more easy on the eyes than harshly popping a text underline on. To set the color, you can find this code in Bricks > Settings > Custom Code.
How do I use this Sandbox?
GitHub RepoGrab the code from the repo link above, set it up on a local copy, and you're in business. It's that easy. If you have any questions about using any of the plugins included in this Sandbox, please let me know.